
Understanding Alarm System Installation Diagrams
Overview of Alarm System Diagrams
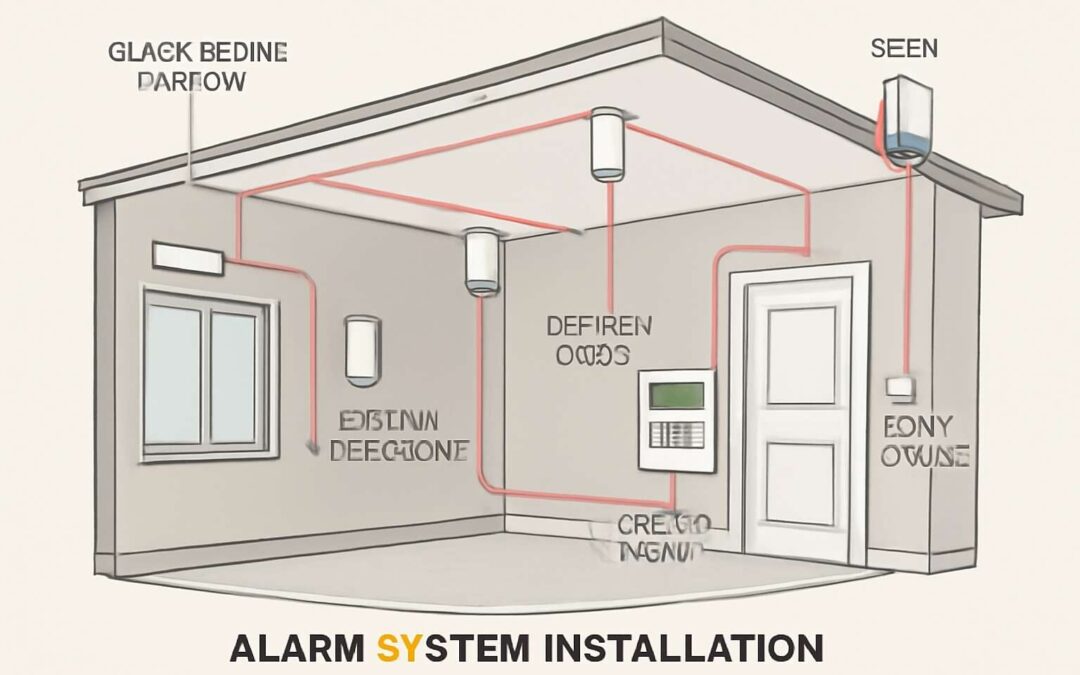
Understanding alarm system installation diagrams is crucial for ensuring your security setup functions flawlessly. These diagrams serve as visual blueprints, mapping out how sensors, control panels, and alarms connect within your property. In South Africa, where security concerns are prominent, a clear alarm system installation diagram can make all the difference in avoiding costly mistakes. They not only streamline the installation process but also help identify potential vulnerabilities before they become an issue.
Most alarm system installation diagrams include key elements such as the placement of motion detectors, door contacts, and sirens. Recognizing how these components interrelate can save time and prevent confusion during setup. An effective diagram provides a comprehensive overview, making it easier for technicians to follow a logical sequence, ensuring every part of the system works harmoniously. For those considering a DIY approach, understanding these diagrams is vital for troubleshooting and future upgrades.
By understanding the fundamentals of an alarm system installation diagram, you gain insight into the intricate network that protects your home or business. It’s a vital tool that bridges the gap between theoretical security plans and real-world application. Whether you’re installing a new alarm system or upgrading an existing one, a detailed diagram ensures your security measures are both effective and reliable.
Types of Alarm System Schematics
Understanding the different types of alarm system installation diagram is essential for anyone serious about safeguarding their property. These schematics serve as the blueprint for translating security plans into tangible reality, revealing how each component interlocks within the overall system. In South Africa, where threats are often unpredictable, recognizing the nuances of these diagrams can mean the difference between a secure home and a vulnerable one.
There are primarily two categories of alarm system installation diagram: simplified schematics and detailed wiring diagrams. The simplified version offers a broad overview—perfect for quick reference or basic installations—highlighting key elements like sensor locations and control panels. Conversely, detailed wiring diagrams delve into the minutiae, illustrating electrical connections, power sources, and backup systems. This depth of detail is invaluable when troubleshooting or planning upgrades.
- Sensor placement strategies
- Power supply routes
- Communication pathways
Each plays a critical role in the system’s integrity and effectiveness.
By grasping these variations, installers and homeowners alike gain insight into the complex network of security technology. An alarm system installation diagram isn’t just a technical document; it’s a map of trust—an intricate dance of signals and responses that, when understood, transforms a mere setup into an unbreakable shield of peace of mind. The human element—how we interpret these diagrams—can often determine the resilience of the entire security architecture.
Key Components in a Wiring Diagram
Understanding the key components of an alarm system installation diagram is akin to deciphering the secret language of security. These diagrams are more than mere sketches; they are the architectural soul of your safeguarding scheme. In South Africa, where the landscape of threats is as unpredictable as a sudden storm, knowing what to look for in an alarm system installation diagram can be your first line of defense.
At the heart of every effective security system lies a meticulous wiring diagram, detailing the intricate pathways that connect sensors, control panels, and power sources. Recognizing these components ensures that each element functions harmoniously. For instance, sensors are strategically placed to detect movement or breaches, while power supply routes guarantee uninterrupted operation—even during load shedding. Communication pathways, often overlooked, facilitate seamless data flow between devices, fortifying the system’s resilience.
To better grasp this symphony of security, consider the fundamental elements:
- Sensors and their placement
- Control panels and user interfaces
- Electrical wiring and power sources
- Backup power systems, such as batteries
- Communication modules for remote alerts
Understanding these essential components within an alarm system installation diagram transforms a complex puzzle into a coherent and reliable security network. It’s not just about wiring—it’s about weaving a fabric of trust, ensuring every thread contributes to the fabric’s strength and durability.
Components of an Alarm System and Their Diagrams
Sensors and Detectors
Understanding the components of an alarm system is essential for designing an effective security setup. Sensors and detectors form the backbone of any alarm system installation diagram. They constantly monitor for movement, smoke, or unauthorized entry, triggering alarms when suspicious activity is detected. These components must be strategically placed to maximize coverage and minimize blind spots.
Common sensors include motion detectors, door/window sensors, and glass break sensors. Each plays a vital role in alerting homeowners or security personnel about potential intrusions. An alarm system installation diagram visually represents how these sensors connect to the control panel, ensuring seamless communication across the system. Proper placement and wiring of these components are crucial to reduce false alarms and improve response times.
- Motion detectors
- Door/window sensors
- Glass break sensors
In South Africa’s evolving security landscape, a well-detailed alarm system installation diagram helps installers optimize sensor placement and wiring. This ensures reliable detection and long-term durability of the entire security setup. Every component must work in harmony, guided by a clear diagram that maps out the entire system architecture with precision.
Control Panel Layouts
In the intricate dance of securing a property, understanding the components of an alarm system becomes paramount. Central to this choreography is the control panel, often regarded as the brain that orchestrates the entire security network. Its layout is carefully designed to facilitate seamless communication between sensors, detectors, and alarm triggers. An effective alarm system installation diagram ensures that wiring pathways are optimized, reducing the risk of false alarms and enhancing system reliability.
Within the schematic, the control panel’s placement is crucial; it must be accessible yet protected, serving as the hub for all security signals. To better visualize this, many installers rely on detailed diagrams that map out each connection point. These diagrams often include a numbered or color-coded system, guiding precise wiring and component placement. Such clarity guarantees that every sensor and detector functions harmoniously, fostering long-term durability and peace of mind in South Africa’s evolving security landscape.

Alarm Sounders and Indicators
Within the symphony of security, alarm sounders and indicators play a vital role—they are the sentinel’s voice, announcing intrusions with a commanding presence. These components are the auditory and visual signals that alert occupants and neighbors alike, transforming silent sensors into a chorus of vigilance. An alarm sounder, often a siren or buzzer, must be strategically positioned to maximize reach, ensuring that the alarm resonates through every corner of the property.
Equally important are the indicators—LED lights or display panels—that provide immediate visual confirmation of system status. When designing an alarm system installation diagram, careful placement of these indicators guarantees that the security status is clear at a glance. For clarity and efficiency, installers often incorporate a numbered or color-coded system to map out these components within the schematic, weaving a seamless narrative of safety throughout the property.
In South Africa’s dynamic security environment, understanding the delicate choreography of alarm sounders and indicators enhances the overall system’s reliability. Whether in a sprawling estate or a compact apartment, each element must harmonize perfectly—an orchestration that turns a simple alarm system into a formidable guardian.
Power Supply and Backup Systems
Power supply and backup systems are the unsung heroes of a reliable alarm system installation diagram. Without them, even the most sophisticated sensors and sirens are just fancy paperweights. A stable power source ensures your security system remains vigilant, whether it’s a lazy Sunday or a thunderstorm that could rival a South African safari storm! But what happens when the grid goes down? That’s where backup systems step into the spotlight—think batteries or even generators, ready to spring into action when mains power falters.
In designing a foolproof alarm system installation diagram, it’s crucial to incorporate these backup elements seamlessly. Typically, a dedicated uninterruptible power supply (UPS) or secondary battery banks are integrated, ensuring continuous protection. Here’s a quick rundown:
- Primary power supply (main electrical connection)
- Secondary backup battery (for power outages)
- Automatic transfer switch (to switch between main and backup)
By weaving these components into the alarm system installation diagram, installers craft a security fortress that doesn’t sleep—no matter what South Africa’s weather throws at it. After all, a true alarm system is only as strong as its power backup!
Communication Modules
Communication modules are the unsung heroes in your alarm system installation diagram, quietly ensuring that alerts travel faster than a cheetah on a caffeine high. These components act as the digital messengers, linking sensors, control panels, and monitoring stations with the finesse of a seasoned diplomat. Without them, your alarm system might as well be shouting into a void—loud but unheard.
Modern alarm system installation diagrams often feature a variety of communication methods, from traditional landlines to cutting-edge GSM modules and internet-enabled Wi-Fi connections. This technological cocktail guarantees that whether you’re in Johannesburg or the Cape, alerts reach your security team without delay. To make sense of it all, here’s a quick rundown of the typical communication components involved:
- GSM Modules – Perfect for remote areas where landlines are as scarce as a unicorn.
- Ethernet / Wi-Fi Modules – Ideal for urban settings with robust internet infrastructure.
- Cellular Backup – Keeps the alarm system talking even when the mains go dark or the network falters.
In the grand scheme of the alarm system installation diagram, these modules are the vital arteries that keep the security heartbeat alive. They ensure that notifications aren’t just sent—they arrive, loud and clear, no matter what South Africa’s unpredictable weather or power issues throw at them. After all, a security system that can’t communicate is just a fancy paperweight—no matter how shiny or expensive!
Step-by-Step Guide to Reading and Interpreting Installation Diagrams
Identifying Symbols and Notations
Within the labyrinth of wires and symbols lies a language more poetic than one might imagine—an alarm system installation diagram. This intricate blueprint is a map of security, revealing the unseen threads that form a fortress of protection. To decipher this symphony of lines and notations, one must first understand the subtle dance of symbols, each whispering its purpose. It’s akin to learning a new dialect—every line, every icon, holds a story of safety and vigilance.
Reading an alarm system installation diagram requires patience and an eye for detail. Begin by familiarizing yourself with common notations such as power sources, sensors, and control panels. Recognizing these symbols is key to interpreting how each component harmonizes. For clarity, consider these essential steps:
- Identify the power supply symbols, ensuring the backbone of your security system is robust.
- Locate sensor icons, which serve as the vigilant eyes and ears of the system.
- Follow the wiring routes, tracing the connections that bind components into a cohesive network.
By mastering these notations, one unlocks the secrets embedded within the diagram, transforming abstract lines into a living, breathing security network—an elegant dance of technology designed to safeguard what matters most. Every alarm system installation diagram becomes a poetic blueprint, guiding technicians and homeowners alike through the silent ballet of protection that stands guard in South Africa’s vibrant landscape.
Understanding Wiring Paths
Understanding wiring paths within an alarm system installation diagram is akin to deciphering a hidden language—one that reveals the delicate balance between vulnerability and protection. It’s not merely about following lines; it’s about sensing the unseen currents that connect sensors, control panels, and power sources into a cohesive network. In South Africa’s vibrant landscape, where security must be both resilient and intuitive, mastering these pathways becomes an act of silent vigilance.
As you trace the wiring routes, pay close attention to how components interlink, creating a web of interconnected safety. Recognizing the flow of electrical currents and their designated pathways allows you to identify potential weak points—those critical junctures where a breach could occur. To streamline this process, consider the following steps:
- Start at the power supply, ensuring your alarm system installation diagram clearly marks the main and backup power sources.
- Follow the wiring from sensors to the control panel, noting any junction points or connectors.
- Pay attention to the routing of cables through walls, ceilings, or conduits—these are the arteries of your security network.
Every line on the diagram isn’t just a wire—it’s a lifeline, a thread woven into the fabric of protection. By understanding these wiring paths, you gain insight into the system’s resilience, appreciating the intricate dance of technology and trust that guards South Africa’s homes and businesses with quiet, unyielding strength.
Connecting Sensors and Devices
Deciphering an alarm system installation diagram is a meticulous art, where each connection tells a story of security and foresight. To connect sensors and devices effectively, it’s vital to approach the diagram with both curiosity and precision. Start by identifying the symbols representing sensors, control panels, and power sources—these are the foundational elements of your security web. Understanding how these components interlink reveals the system’s logic and operational flow.
Next, follow these steps to interpret connections seamlessly:
- Trace the wiring from each sensor to the control panel, noting any junction points or connectors that facilitate multiple connections.
- Pay attention to routing pathways—whether through conduits, walls, or ceilings—as these routes safeguard the wiring from damage and tampering.
- Ensure the wiring from sensors is clearly marked, differentiating between power, data, and alarm signals. This clarity enhances troubleshooting and future upgrades.
By immersing yourself in the intricacies of the alarm system installation diagram, you unlock a deeper understanding of how each component contributes to an integrated, resilient security network—especially vital in South Africa’s diverse landscape of safety challenges.
Ensuring Proper Power and Communication Wiring
Deciphering an alarm system installation diagram isn’t just for the tech-savvy; it’s a dance of logic and precision that even a novice can master with a bit of patience. Imagine the diagram as a treasure map—each line and symbol leads you closer to a fortress of security. The key is ensuring proper power and communication wiring, which are the lifeblood of any reliable alarm system. Without a clear understanding of how these connections flow, even the most sophisticated sensors can become silent sentinels.
To navigate this maze successfully, start by identifying the power sources—these are the anchors that keep the entire system alive. Next, follow the wiring paths, paying special attention to junction points that enable multiple connections. An alarm system installation diagram often employs a variety of notations, so familiarizing yourself with these symbols ensures you’re reading the blueprint, not just looking at a confusing scribble. Proper routing, combined with meticulous marking of data and alarm signals, guarantees seamless communication across your security network—crucial in South Africa’s diverse safety landscape.
Designing Your Alarm System Installation Diagram
Planning Sensor Placement
Designing an effective alarm system installation diagram isn’t just about connecting wires; it’s about creating a fortress of security that adapts seamlessly to your environment. Accurate sensor placement is the backbone of this blueprint. When sensors are strategically positioned—covering entry points, blind spots, and high-value areas—they become silent guardians, alerting you at the faintest sign of intrusion. It’s a game of precision, where every angle and height matters.
To optimize sensor placement, consider the layout of your property. High-traffic zones and vulnerable entry points demand close attention. Imagine plotting a detailed alarm system installation diagram that guides every sensor’s location, ensuring no corner is left unprotected. Remember, an alarm system installation diagram isn’t just technical; it’s a narrative of security, telling a story of vigilance that’s as robust as it is unobtrusive.
- Entry points like doors and windows
- High-value rooms and safes
- Dark corners or secluded areas
By carefully planning sensor placement within your alarm system installation diagram, you craft a layered defense. It’s a subtle dance—balancing coverage, false alarm reduction, and ease of maintenance—that transforms your security system from mere equipment into an unbreakable shield. In South Africa’s unpredictable landscape, this meticulous planning becomes your most trusted ally in safeguarding what matters most.
Mapping Wiring Routes
Designing your alarm system installation diagram is a delicate craft—one that requires more than just connecting wires; it’s about weaving a tapestry of security that embraces every corner of your property. Mapping wiring routes with care ensures that each sensor, detector, and control panel is seamlessly integrated, creating a harmonious flow that minimizes vulnerabilities and simplifies future maintenance. It’s a process that demands patience and precision, especially in South Africa’s diverse landscapes where every property presents unique challenges.
As you develop your alarm system installation diagram, think of it as a blueprint for peace of mind. Consider the natural flow of movement around your home or business, and identify the most strategic wiring routes. When these routes are thoughtfully planned—whether running along walls, through ceilings, or beneath floors—they become invisible guardians, safeguarding your haven without disrupting its aesthetic charm.
Integrating Wireless Components
Crafting a harmonious alarm system installation diagram is akin to orchestrating a symphony of security—where wireless components dance effortlessly within the layout. The integration of wireless sensors, detectors, and control panels offers a liberating flexibility that traditional wiring often cannot match. Imagine a seamless web of connectivity, where signals traverse the space unencumbered, creating an invisible fortress that adapts to your property’s unique contours.
When designing this intricate blueprint, consider the natural flow of movement and the strategic placement of wireless modules. This approach not only enhances security but also simplifies future upgrades and troubleshooting. Incorporate elements such as wireless alarm sensors and communication modules thoughtfully, ensuring they complement each other in a symbiotic embrace. The result? An alarm system installation diagram that melds elegance with resilience, embracing South Africa’s diverse landscapes and architectural nuances with equal grace.
Adhering to Safety and Code Requirements
Designing your alarm system installation diagram isn’t just about drawing lines and symbols; it’s about crafting a blueprint for peace of mind—crafted with precision and a dash of foresight. Safety and code requirements are the backbone of this process, ensuring your security system not only functions flawlessly but also complies with local regulations, especially in the vibrant landscape of South Africa. Ignoring these standards can turn a sleek diagram into a costly nightmare, so it’s essential to adhere to safety protocols and building codes from the outset.
To streamline your planning, consider implementing a step-by-step approach that prioritizes the most critical zones for alarm coverage. This ensures that every sensor, detector, and control panel complements each other, creating a harmonious security symphony. Remember, a well-designed alarm system installation diagram isn’t just about protection—it’s about resilience, adaptability, and peace of mind. By weaving in compliance and safety considerations seamlessly, you craft a blueprint that stands the test of time and regulatory scrutiny, no matter how diverse South Africa’s architectural tapestry may be.
Tools and Resources for Creating and Following Diagrams
Diagram Software and Apps
Creating a comprehensive alarm system installation diagram demands precision and the right set of tools. Thankfully, modern diagram software and apps have revolutionized this process, making it accessible even for those new to security system design. These resources allow for detailed visualization, ensuring each component—from sensors to communication modules—is accurately mapped out. When selecting diagram software, look for features like drag-and-drop interfaces, real-time collaboration, and extensive symbol libraries. Such tools streamline the planning phase, ultimately reducing errors and rework during installation.
Popular options include industry-standard applications like AutoCAD and specialized security diagram tools such as SmartDraw or Lucidchart. These apps support custom symbols, facilitate precise wiring route mapping, and help visualize complex alarm system installation diagrams with clarity. Whether you’re working on a small residential setup or a large commercial installation, leveraging the right software enhances both efficiency and accuracy. Remember, a well-crafted alarm system installation diagram is the blueprint for a seamless, reliable security setup that stands the test of time!
Electrical Symbols Library
Creating an alarm system installation diagram isn’t just about connecting wires and placing sensors; it’s about understanding the language of electrical symbols that breathe life into your designs. An electrical symbols library acts as a secret codebook, translating complex circuitry into universally understood icons. This resource is invaluable, especially when working on intricate alarm system installation diagrams where clarity is king. By leveraging a comprehensive symbols library, installers can ensure each component—be it a sensor, control panel, or power source—is represented accurately, reducing misinterpretation and costly errors.
Accessible tools like diagram software often come equipped with extensive electrical symbols libraries, making it easier to craft detailed and precise alarm system installation diagrams. These libraries help visualize wiring routes, sensor placements, and communication pathways with pinpoint accuracy. When combined with resources like online tutorials and manufacturer datasheets, they empower professionals to develop robust security plans tailored for both residential and commercial properties. In this way, a well-utilized symbols library becomes the backbone of a seamless, reliable alarm system installation process—transforming complex schematics into clear, actionable blueprints.
Installation Manuals and Guides
Creating a seamless alarm system installation diagram demands more than just technical know-how; it requires the right tools and resources that transform complex schematics into visual poetry. Advanced diagram software and specialized apps serve as the artisan’s palette, offering an extensive array of symbols, templates, and customization options. These digital marvels allow installers to craft intricate wiring routes and sensor placements with precision, ensuring every component aligns perfectly within the grand design of security architecture. Such tools are invaluable in South Africa’s diverse landscape, where every property demands a bespoke approach.
Moreover, a treasure trove of resources—ranging from manufacturer datasheets to online tutorials—acts as guiding stars in the journey of alarm system installation diagram creation. These references deepen understanding, enabling professionals to interpret symbols and notations accurately, reducing the risk of misinterpretation. For example, detailed datasheets clarify sensor specifications, while step-by-step tutorials illuminate best practices for connecting communication modules and power sources. When these elements are combined, they forge a pathway to flawless installation, transforming complex blueprints into clear, actionable plans that stand the test of time and terrain.
Professional Consultation Tips
Creating a precise alarm system installation diagram hinges on access to a treasure trove of tools and resources that elevate the process from mundane to masterful. The right software, from sophisticated diagram apps to specialized design tools, transforms complex schematics into visual poetry, making the task less daunting and more intuitive. These digital marvels offer an array of electrical symbols library and customizable templates, which are invaluable when mapping wiring routes or sensor placements. Harnessing such tools ensures that every connection aligns seamlessly, especially when tailoring alarm system installation diagrams for South African properties with unique landscapes and architectural nuances.
In addition to powerful software, professional consultation remains a cornerstone of successful alarm system installation. Expert insights can clarify ambiguities, especially when interpreting symbols or understanding wiring paths. For instance, consulting with seasoned technicians ensures the correct integration of wireless components or backup power systems, reducing costly errors down the line. Engaging with industry veterans also provides access to online tutorials and manufacturer datasheets, deepening understanding and fostering confidence in each step of the diagram creation process. When combined, these resources forge a pathway toward flawless installation, turning complex blueprints into actionable plans that stand resilient against time and terrain.
Common Mistakes to Avoid in Alarm System Wiring Diagrams
Overlooking Power Supply Needs
One of the most overlooked aspects in an alarm system installation diagram is the power supply needs. Many installers focus heavily on sensor placement and wiring routes but neglect to account for the total power requirements of the system. This oversight can lead to insufficient power, causing false alarms or system malfunctions when multiple devices draw more current than the power supply can handle. In rural settings, where power stability might be inconsistent, it’s crucial to plan for reliable backup options from the outset.
Failing to identify the correct power source can also result in safety hazards or damage to sensitive components. When drawing an alarm system installation diagram, ensure that the power supply is rated for the entire system’s load. Consider incorporating
- uninterruptible power supplies (UPS)
- backup batteries
to maintain security during outages. A well-designed diagram not only maps the wiring but also emphasizes the importance of robust power planning, safeguarding your home or business from unexpected disruptions.
Incorrect Sensor Placement
One of the most insidious mistakes in alarm system installation diagram design is incorrect sensor placement. When sensors are positioned haphazardly or without strategic intent, the entire system’s reliability suffers. It’s tempting to prioritize ease of access or visual appeal, but overlooking sensor placement can create blind spots or false alarms that undermine security. In South Africa’s diverse environment, where terrain and lighting conditions vary drastically, this misstep becomes even more costly.
Proper sensor placement isn’t just about covering every corner; it’s about understanding human behavior and environmental variables. For instance, placing motion detectors near heat sources or windows prone to drafts can trigger unnecessary alerts, wasting valuable response time. Conversely, neglecting key entry points leaves vulnerabilities that could be exploited. A well-crafted alarm system installation diagram helps visualize these critical zones, ensuring sensors are positioned for optimal coverage without compromising safety.
In the end, the precision of sensor placement within your alarm system installation diagram reflects a deeper understanding of security’s moral core—protecting what matters most without inviting chaos or complacency. Avoid these common pitfalls, and your system becomes a vigilant guardian rather than a source of confusion or frustration.
Ignoring Circuit Isolation
In the intricate web of security, neglecting circuit isolation within your alarm system installation diagram can be a silent catalyst for chaos. When circuits are interconnected without proper segmentation, a single fault—be it a short circuit or a power surge—can cascade through the entire system, rendering it useless or worse, creating false alarms that erode trust. This oversight often stems from a desire for simplicity, but the cost is a compromised safety net that leaves vulnerabilities lurking beneath the surface.
Implementing circuit isolation isn’t merely a technical requirement; it’s a philosophy rooted in resilience. Properly isolated circuits ensure that a fault in one zone remains confined, preventing the domino effect that could disable critical components. When designing an alarm system installation diagram, visualizing these isolated pathways helps prevent complex troubleshooting and enhances overall system longevity.
- Identify critical zones and assign dedicated circuits.
- Use high-quality disconnects and circuit breakers for each segment.
- Incorporate redundancy where necessary to bolster reliability.
In South Africa’s unpredictable environment, where power fluctuations and surges are commonplace, this level of meticulous planning transforms a basic alarm system into an indomitable guardian. Overlooking circuit isolation not only jeopardizes the integrity of your security infrastructure but also undermines the very essence of safeguarding what matters most.
Inadequate Safety Precautions
In the realm of alarm system installation diagrams, one of the most insidious pitfalls is neglecting safety precautions during wiring. Overlooking proper safety measures can turn a well-meaning setup into a hazardous ordeal, especially in South Africa’s volatile power environment. A single misstep—such as failing to disconnect power sources or ignoring grounding procedures—can lead to electrical shocks or damage to sensitive components. These mistakes not only compromise safety but also threaten the integrity of the entire alarm system installation diagram.
To avoid these hazards, it’s essential to incorporate robust safety protocols at every stage. For instance, always ensure that power supplies are isolated before working on the wiring, and use insulated tools to prevent accidental shorts. Additionally, clearly marking live wires and employing circuit breakers tailored for alarm systems serve as vital safeguards. Remember, a secure wiring process is the backbone of a reliable alarm system installation diagram, safeguarding both personnel and the system itself from unforeseen risks.
